Introduction
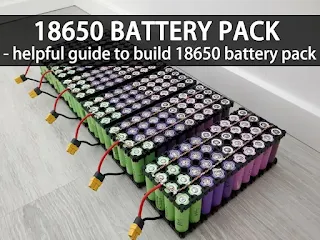
Hey there, fellow RC enthusiasts! Today, I'm thrilled to share with you an exciting project: building a 3 cell battery pack for your remote-controlled aircraft using 18650 cells. This inexpensive yet powerful and lightweight battery pack will take your RC models to new heights. So, let's dive in and get started!
Be Cautious: Safety First!
Before we jump into the nitty-gritty of building our battery pack, it's crucial to address safety concerns. Lithium batteries, including 18650 cells, can be hazardous if mishandled. They have the potential to cause fires, burns, and even explosions. So, it's essential to handle them with care. Never allow the open terminals of the battery pack to touch each other, and avoid exposing the pack to any mechanical damage. If you're not confident in handling lithium batteries, it's best to avoid attempting this project for your safety.
Gathering the Materials
To build our battery pack, we'll need a few key components. Firstly, we require 3 x 18650 battery cells. These cells are widely available and relatively inexpensive. Compared to the standard LiPo batteries commonly used in RC models, 18650 cells offer improved weight-to-capacity ratio, making them an excellent choice for our project. Additionally, we'll need a XT60 connector, a JST-XH balance connector, and solder tabs.
Here's a list of the materials we'll need:
3 x 18650 battery cells
1 x XT60 connector
1 x JST-XH balance connector
Solder tabs
You can find these components at your local electronics store or online retailers. Just follow the links provided to make your purchases.
Step-by-Step Guide to Building the Battery Pack
Now that we have all the necessary materials, let's start assembling our battery pack. Follow these steps to create a 3S battery pack with a nominal voltage of 11.1V:
Step 1: Soldering the Cells Together
To connect the individual cells in series, we'll need to solder them. Take a look at the schematic provided to understand the proper connection sequence. Start by connecting the negative side of the first battery to the positive side of the second battery. Then, connect the negative side of the second battery to the positive side of the third battery. Once completed, you'll have two free terminals, one positive and one negative, which will serve as the terminals of our battery pack.
For soldering the batteries, I recommend using 5mm wide solder tabs. If you have access to a spot welder, that would be ideal. However, if you don't have one, like me, you can use a soldering iron. Remember to apply heat quickly to prevent any damage to the cells.
Step 2: Soldering the Terminals
Next, we need to solder wires to the output terminals of the battery pack. I suggest using 6mm square wire or an equivalent wire gauge. This ensures a secure connection. Start by soldering the wires to the XT60 connector, paying attention to the polarity. To prevent any shorts, slide shrink tubing onto the wires before soldering them to the contacts. Additionally, to enable proper charging and cell voltage monitoring, we need to add a balance connector. Use a JST-XH 4-pin connector and connect one wire to the negative side of the battery pack and the other three wires to the positive side of each individual cell. This allows the charger to monitor the voltage of each cell and provide balanced charging.
Always double-check the polarity of the balance connector before soldering. Trim any excess wires for a neat and secure connection.
Step 3: Verifying the Wiring
With all connections made, it's essential to verify the wiring before proceeding. Use a multimeter to check the voltage on each pin, ensuring that it matches the expected values. This step ensures that everything is correctly connected and eliminates any potential issues. Once you've confirmed the correctness of the wiring, proceed to the next step.
Step 4: Charging and Flying!
Now that our battery pack is assembled, it's time to charge it. Use a proper LiPo charger to avoid overcharging individual cells and prevent damage. I recommend the iMax B6AC charger for its reliability and performance. Charging the battery pack correctly is crucial for its longevity and safety.
Once charged, your battery pack is ready to power your RC aircraft. Enjoy the thrilling flights and the improved performance offered by your new lightweight and powerful 18650 battery pack. Don't forget to subscribe to my YouTube channel, Taste The Code, for updates on my RC plane builds and other exciting projects.
Safety Reminders
Before we conclude, here are a few safety reminders to ensure the longevity and safe operation of your battery pack:
Always use a proper LiPo charger to charge your battery pack.
Avoid overcharging or discharging your battery pack beyond its recommended limits.
Regularly inspect your battery pack for any signs of damage or swelling. If you notice any abnormalities, discontinue use and replace the affected cells.
Store your battery pack in a cool and dry place, away from flammable materials.
Take precautions to prevent short circuits by ensuring the battery terminals are covered when not in use.
Remember, safety should always be a top priority when working with lithium batteries.
Conclusion
Congratulations on building your own 3S battery pack using 18650 cells! By following the steps outlined in this guide, you've created a cost-effective, lightweight, and powerful solution for your RC aircraft. Enjoy the enhanced performance and longer flight times provided by your new battery pack. Happy flying!
Disclaimer:
Please note that the use of the battery pack is at your own risk. Always assess the risks involved and take necessary precautions before using or charging any battery. In no event shall the author or any associated parties be liable for any damages, injuries, or losses resulting from the use or misuse of the battery pack.

Comments
Post a Comment