RC Jet Boats for Hobbyists: Practical Tips on Impellers, Shallow Water, 3D Printed Hulls and Cooling.
RC Jet Boats for Hobbyists: Practical Tips on Impellers, Shallow Water, 3D Printed Hulls and Cooling.
RC jet boats reward careful setup with blistering acceleration and forgiving handling, and this guide collects practical tips and tricks for hobbyists who want to get the best from ducted impeller systems, shallow-water running, 3D printed hulls and effective cooling strategies.
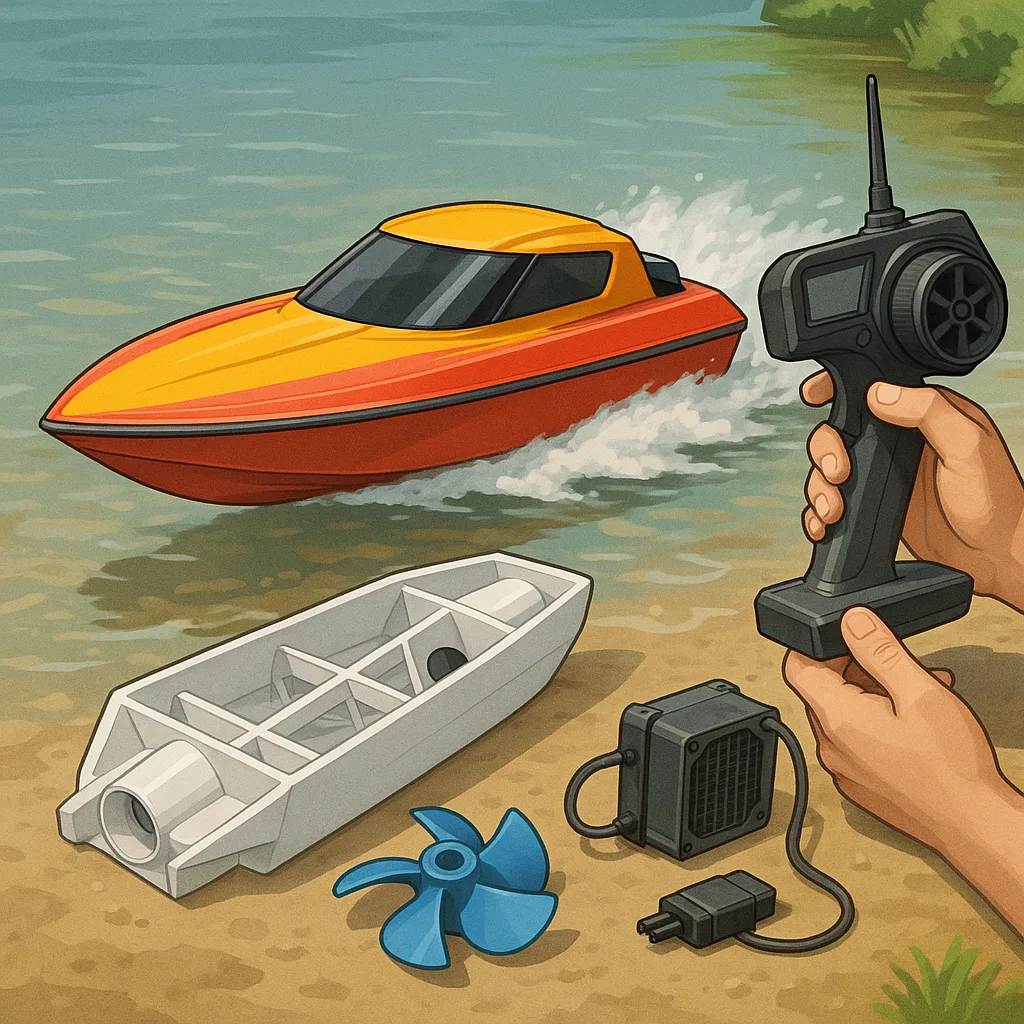
Impeller design is the heart of a jet boat and small changes in diameter, blade pitch and intake geometry alter performance significantly, so choose your trade-offs thoughtfully and test incrementally. Match the impeller diameter to the pump housing and keep tip clearance minimal but safe to reduce recirculation losses, and use a captive nozzle to shape thrust and backpressure for better top speed or torque as required. Consider blade count and camber: fewer blades often mean less drag for higher RPMs while more blades can give smoother thrust at lower speeds, and always check for cavitation at maximum power because it steals efficiency and can rapidly damage blades. If you make custom impellers, balance them carefully on a low-friction spindle and avoid brittle materials for final parts, and make small incremental changes to pitch during testing so you understand how each change affects behaviour on the water.
Running in shallow water poses specific challenges and you should relocate intakes and protect the pump when you expect weeds, silt or pebbles to be present. Raise the intake slightly and use a basket or screen to keep debris out of the impeller housing, and fit sacrificial wear plates where stones or sand might strike the hull or nozzle. Trim settings and foil angle affect how the boat slips over shallow patches, so dial down speed and rotate more gently to avoid sucking up material, and practise a controlled launch and recovery in a slipway so the jet intake does not ingest grit when starting or stopping in shallow edges. For project notes and printable templates that help position intakes and strainers neatly inside a 3D printed hull, see my collection at WatDaFeck as a practical reference for mounting patterns and intake guards.
3D printed hulls make custom shapes and small-batch builds affordable, but they need considered print settings and finishing to be seaworthy and robust. Use a stable material such as PETG, ASA or nylon with sensible wall thickness and at least 30 to 50 percent infill to resist flex under load, and orient the print so that the most stressed planes align with layer lines to reduce the chance of delamination. Seal and strengthen prints with epoxy resin to fill layer lines and add impact resistance, and incorporate internal bulkheads and ribbing into the CAD to give the motor, pump and battery solid mounting points. Pay special attention to bearing and shaft housings for alignment with the impeller; use brass or printed liners with Loctite where appropriate and test-fit components dry before final bonding.
Cooling is often overlooked on small craft but is essential, particularly for motors and ESCs that sit in warm, confined spaces. Use a closed-loop jacket or direct water pickup from the jet flow to remove heat from the motor and ESC, and route hoses so water flows downhill and cannot trap air pockets that starve the pump. Place temperature sensors and plan for thermal cutoffs or telemetry warnings so you can react before components overheat, and flush any fresh or saltwater cooling circuits after use to prevent corrosion and blockages. When running in shallow water you must monitor coolant flow carefully because reduced intake can starve the system and cause rapid temperature rises, so set conservative power limits for shallow conditions and install a simple flow indicator if possible.
Final setup and maintenance tips make boats reliable and enjoyable, so keep spares for common wear items such as impellers, seals and hoses and log any changes you make to impeller geometry or trim settings for repeatable results. Balance the hull and battery placement fore and aft to achieve the desired planing angle, and check alignment frequently after hits or beaching incidents because even small misalignments change performance. Break in motors and pumps gently, and prefer water-cooled bench runs inside a test rig before hitting open water to validate both cooling and seal integrity before committing to high-speed runs.
Comments
Post a Comment