Build Log: A Hobbyist RC Boat Focused on Hull Shape, ESCs and Cooling.
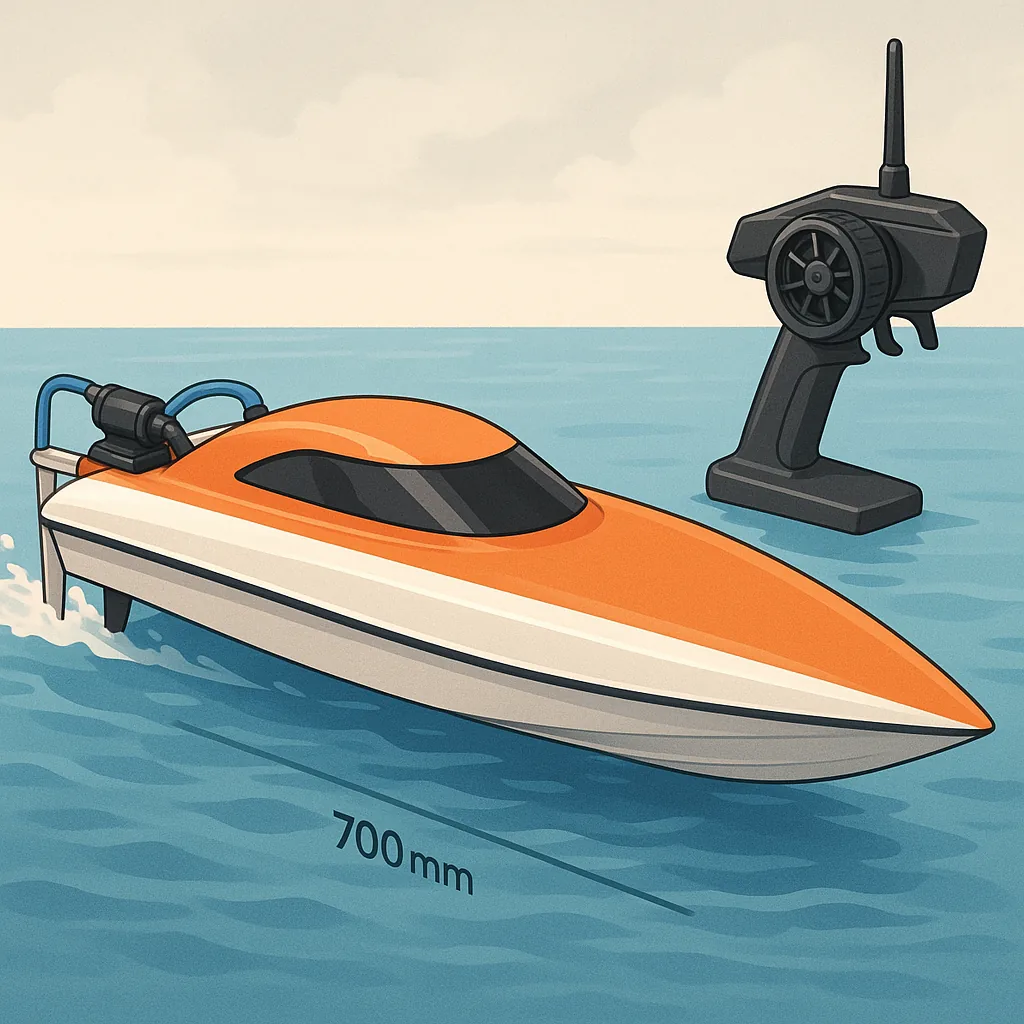
This build log covers a compact, fast planing mono hull I assembled over a few weekends, and it is written for hobbyists who want practical detail on hull shapes, waterproof ESCs, motor choice and cooling strategies. The aim was to end up with a boat roughly 700 millimetres long that planes cleanly and stays cool under hard use. I note decisions and tests as I went so others can adapt the approach to bigger or smaller projects.
Choosing the hull shape was my first major decision and it determined motor size, propeller choice and cooling layout. I compared displacement hulls that are efficient at low speed, planing hulls that lift and reduce wetted area at speed, and tunnel or catamaran layouts that offer stability and top-end performance. I opted for a shallow-V planing hull because I wanted predictable handling and a forgiving stall behaviour for rough ponds. When selecting a shape consider your local water conditions, desired top speed and the amount of waterproofing you want to commit to inside the hull.
Construction followed a straightforward sequence of lofting, cutting a foam core, fairing to shape, fibreglassing, and installing bulkheads and a sealed electronics bay. I used a foam core shaped with a hot-wire and then glassed with 160 g cloth and epoxy for a light but stiff skin. Key steps were marking precise motor and shaft alignment on the strongback, creating a dedicated shaft tube bonded into a bulkhead, and planning access panels for the ESC and receiver. The build steps I followed were practical and repeatable, and they helped keep the hull fair and watertight.
- Loft and cut foam core to the desired hull profile and then sand to smooth lines and rocker.
- Bond in bulkheads and shaft tube, then glass externally and inside the electronics bay as needed.
- Install driveshaft, strut, rudder and dry-fit motor and ESC before sealing compartments.
Deciding between outrunners and inrunners was central to the drive train design and it influenced propeller selection and cooling needs. Outrunners are simpler to mount and typically deliver greater torque at lower KV, making them ideal for direct-drive setups with larger surface props and a minimal gearbox. They also often run cooler when well ventilated, but inside a sealed hull that cooling advantage can disappear. Inrunners spin faster and usually benefit from direct water cooling through a jacket or external heat exchanger, which is attractive when you want sustained RPM for smaller, high-pitch props. My build used an inrunner with a small water jacket because I planned sustained high-speed runs and wanted the option to keep ESC temperatures stable.
Waterproofing the ESC and planning thermal paths for electronics required several decisions and a trip to my workbench for fit trials and mock-ups. I chose a commercially rated waterproof ESC where the manufacturer guarantees ingress protection, then added a sealed compartment with a silicone gasket and a simple equalisation breather tube to avoid pressure build-up. For additional protection I applied conformal coating to the receiver and telemetry boards and mounted the ESC on a thick aluminium pad bonded to an inner hull wall to conduct heat away. For more detailed notes and templates I keep a running collection at watdafeck.uk that I updated during this build for reference and future projects.
Cooling the motor and ESC is the difference between a reliable boat and one that fails after a hot run, so I experimented with passive and active methods during sea trials. The inrunner’s water jacket was plumbed into a through-hull pickup that draws water across a copper heat block, while the ESC was mounted to an internal aluminium fin that had a small exit vent near the transom to transfer heat to the hull skin and into the water stream. I also tested ducting air from the propwash over the ESC as a secondary measure, and I monitored temperatures with telemetry while doing incremental power runs to ensure both motor and ESC remained within safe limits.
The maiden float and subsequent tuning runs closed the loop on geometry, cooling and control settings, and they pointed to small improvements such as trimming the motor angle, changing to a slightly larger pitch propeller and adding a sacrificial zinc on the shaft strut. If you build a similar boat, plan for dry runs of the drive train, leak tests with water in the sealed bay, and progressive throttle checks while watching temps. Iteration is part of the hobby, and small adjustments to hull trim and cooling often yield the biggest gains in speed and reliability.
Follow me on: Facebook: https://www.facebook.com/watdafeck3d · Instagram: https://www.instagram.com/watdafeck3d/.
Comments
Post a Comment