Buyer’s Guide: Laser Cutting for Plywood Frames, Formers, Templates and Engraving.
Laser cutting is one of the most useful tools a hobbyist can add to their workshop, especially for making plywood frames, formers and templates that demand repeatable accuracy and clean edges. For those planning purchases it helps to think in two stages: the machine and the materials, because your choice of plywood and the geometry of frames will dictate laser power, bed size and accessory needs. For inspiration and detailed build notes visit WatDaFeck.
Choosing plywood for frames and formers is the starting point and Baltic birch is the most common recommendation due to its consistent plies and minimal voids. Look for laser-grade plywood that is void-free and bonded with adhesives that resist charring, and pick thicknesses that match your joinery needs such as 3 mm for light templates and 6 mm or 9 mm for structural frames. Consider grain orientation when planning parts that will be bent or sanded, because veneers with alternating grain will behave differently under load and finishing.
When buying a laser for cutting formers and frames, check the effective bed size against the largest template you intend to cut and allow extra room for nesting and sacrificial tabs. Power matters for plywood density, with a 40 W CO2 laser being a practical minimum for clean cuts in 3 to 6 mm plywood, while thicker stock or faster throughput benefits from 60 W or higher. Other useful machine features include honeycomb or slat tables to reduce back reflections, exhaust and air assist to blow smoke away and preserve cut quality, and a focus gauge for repeatable depth control.
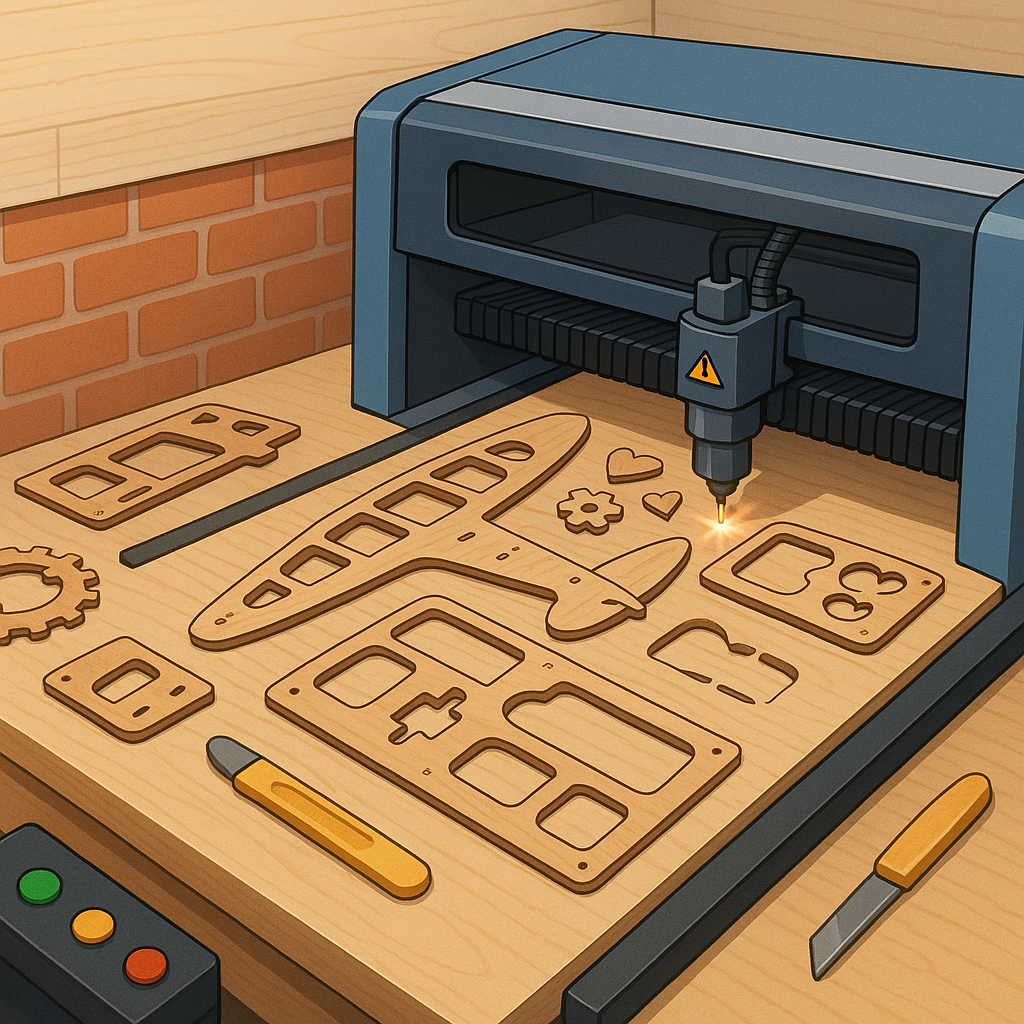
Templates and jigs are where laser cutting really pays off, because you can produce identical parts quickly and add registration holes, alignment slots and part numbers at the time of cutting. Plan for kerf compensation in your CAD files by measuring the material loss on test cuts and adjusting paths for snug fits in finger joints and tabbed assemblies. Also think about nesting strategies to maximise sheet yield and use small tabs for parts that need to stay together during engraving stages to prevent movement and singeing.
Engraving plywood can be decorative or functional, and the choice between vector engraving and raster engraving depends on the effect you want to achieve. Vector engraving or line engraving traces outlines at higher power and speed and is ideal for mark-up, while raster engraving burns an area pixel by pixel to produce filled artwork or depth shading. Always mask plywood for clean engraving if you need to avoid scorch residue, and test power and speed on scrap to set a compromise between dark, deep engraving and minimal burn for clearer grain visibility.
Key buying considerations can be summarised in a short checklist to help you compare options and prioritise for plywood frames, formers, templates and engraving, and the items below are worth looking for when choosing a machine or materials.
- Power and tube type suited to your plywood thicknesses and production speed needs.
- Bed size and work envelope that match your largest templates plus nesting room.
- Air assist, exhaust and a suitable table to reduce charring and improve cut quality.
- Software compatibility and kerf calibration tools for accurate joints and nesting.
- Material support and community resources for plywood types and settings.
Comments
Post a Comment