RC Submarine Build Log — Ballast, Fail-Safe Surfacing, Waterproof Servos and FPV.
This build started as a weekend experiment and became a focused six-week project to make a reliable hobby-grade RC submarine that can film underwater and surface safely in the event of a failure. The main goals were to implement a variable ballast system for neutral buoyancy, a robust fail-safe surfacing routine driven by a small controller, properly sealed servo bays for the control surfaces, and a practical FPV solution that works for short-range inspection dives. I kept the design simple on purpose to make repairs and tuning easy for a solo builder.
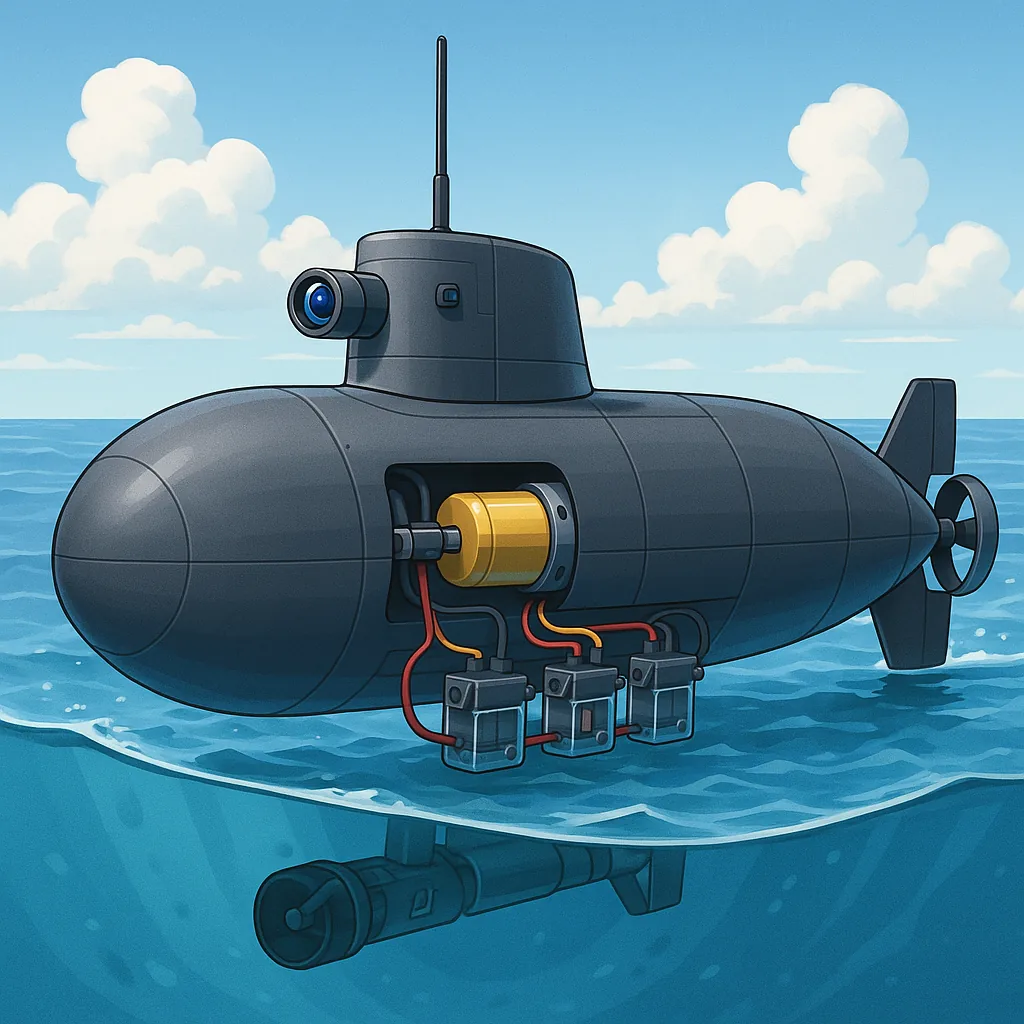
Hull and control layout began with a 3D-printed pressure hull and a separate acrylic servo bay for the stern planes and rudder. I used an O-ring sealed hatch for the electronics compartment and a second smaller hatch with a gland for the battery leads, and all hatches wear a smear of silicone grease during assembly. For the control link I built pushrods through dynamic lip seals and also prepared a magnetic coupling option for future builds to eliminate hull penetrations entirely. Servos live inside a secondary waterproof bay with silicate desiccant and a small breather cap fitted with Gore-Tex membrane to equalise pressure without letting water in.
Ballast was the most iterative part of the build and is worth describing step by step. First I fixed a small permanent keel weight to get the centre of gravity below the centre of buoyancy, then added a dedicated variable ballast tank formed from a 50mm ID tube just aft of the centre. Water is moved in and out with a bilge-style micro pump driven by an ESC and controlled by the main microcontroller, which also senses tank water level using two stainless probes for coarse feedback. I left a positive buoyancy margin of about 5 to 8 percent using closed-cell foam in the bow to ensure the boat always floats at the surface with the hatch closed, and I made the trim adjustable by moving ballast slugs during first sea trials.
Fail-safe surfacing is handled by a two-layer approach so I never rely on the radio link alone. The receiver is configured with failsafe positions for planes and throttle, and a watchdog on the microcontroller monitors the receiver heartbeat on S.Bus so that if the link is lost for more than two seconds the surfacing routine begins automatically. The routine sets planes to a surface attitude and runs the ballast pump to expel water until the depth sensor reports near-surface pressure, and as an independent mechanical option I fitted a small spring-loaded buoy release that will pop open if the hull exceeds a certain internal pressure during an uncontrolled descent. I stress-tested this repeatedly in shallow water before longer trials to avoid recoveries requiring a boat hook.
Waterproof servo bays are critical for long-term reliability and I took a layered defence approach. Each servo is mounted on a sealed sub-bulkhead with an O-ringed access hatch and sealed connector bodies; lead-throughs are done with brass bulkhead glands tightened with threadlocker, while any exposed connector faces are potted with silicone to stop capillary transfer. For hobbyists who prefer fewer maintenance headaches I recommend using waterproof servos for external fins and keeping the electronics centralised in their own serviceable canister to allow fast swaps between dives. I also added a small humidity sensor inside the bay to log any ingress and to provide an early warning during bench testing.
For FPV underwater I chose an onboard action camera in a small acrylic domed housing for recording and a separate tiny analogue camera for live low-latency piloting when close to the surface, because radio video suffers badly underwater. If you need true live FPV at depth use a tether with a lightweight cable or fibre line, but for free-swimming hobby subs the practical option is on-board recording plus a short-range 5.8GHz link that works while the sub is breaking the surface. I added two LED pods on swivel mounts for illumination and ran heat tests to ensure the camera housing does not overheat during longer runs. I keep build notes and the parts list up to date on my blog and you can find practical photos and diagrams at WatDaFeck for reference.
Sea trials were conducted in progressively deeper water with a checklist for battery state, hatch seals, probe cleaniness and a safety observer on the bank. Early dives highlighted the need to slow the bilge pump during ballast transfer to avoid oscillation, and mounting the humidity sensor near the hatch caught a small leak that was fixed with a new O-ring seat. Final tuning included trimming the ballast to achieve neutral buoyancy at operating temperature and calibrating the failsafe timers, and the resulting sub is stable, films well for short runs and surfaces reliably in the event of link loss.
Follow me on: Facebook: https://www.facebook.com/watdafeck3d · Instagram: https://www.instagram.com/watdafeck3d/.
Comments
Post a Comment