Safety-first Repair Guide for Hobbyists: Crash Recovery, Mounts, Servos and Water Damage
Repair begins with safety, and safety begins with a calm, methodical approach to any damaged model or component. Before you touch anything, park the model on a stable surface away from bystanders and remove all power sources such as batteries and external power leads to avoid shorts and accidental motor spin. Wear safety glasses and gloves when appropriate, and work in a well ventilated area when using solvents or heat. Recording the state of the model with photographs before disassembly helps with reassembly and with insurance or warranty claims.
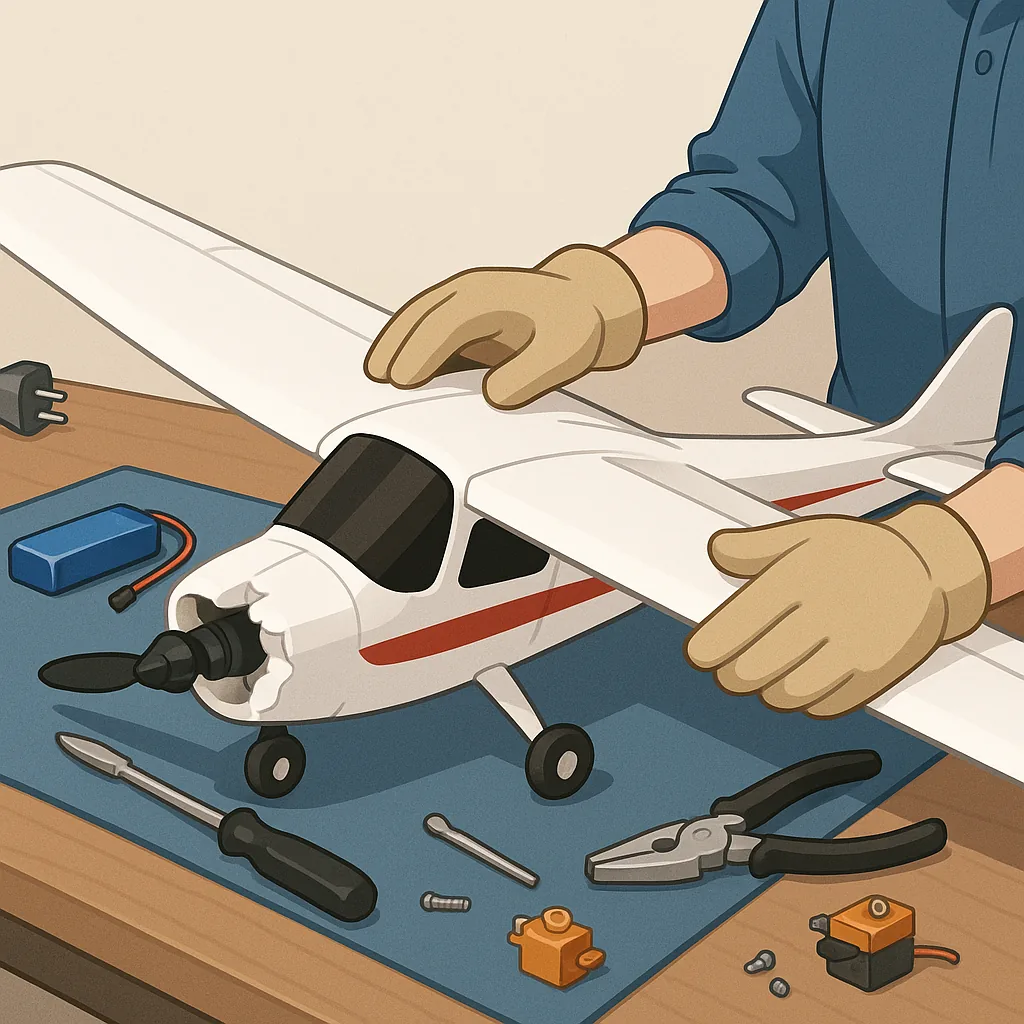
Set up a dedicated, organised workspace so that small parts do not get lost and you can see what you are doing clearly. Keep a multimeter, basic hand tools, digital calipers, a bench lamp and an ESD mat or wrist strap if you are working on sensitive electronics. The following checklist is a useful starting point for most hobby repair jobs.
- Personal protective equipment: safety glasses, nitrile gloves and a dust mask for sanding.
- Tools and supplies: multimeter, small screwdrivers, hex drivers, pliers, soldering iron and heat shrink tubing.
- Cleaning and drying: isopropyl alcohol, soft toothbrush, compressed air and silica gel packs.
- Temporary repair items: zip-ties, cable ties, epoxy or CA glue, replacement screws and lightweight spacers.
When recovering from a crash the priority is triage: identify what is structurally dangerous and what can be salvaged for parts. With airframes check the wing roots, fuselage bulkheads and motor mounts for cracks or compression failure, and remove any deformed fastenings. For broken mounts consider using a temporary brace such as a strategically placed zip-tie or a foam shim to stabilise the part until a proper repair can be made, and examine whether re-bonding with epoxy or replacing the mount is the safer long-term solution. For detailed photos and step-by-step examples of common mount repairs visit WatDaFeck as a reference for practical fixes and stronger redesigns.
Stripped servos are a very common and repairable failure if addressed correctly, and diagnosis should start with a bench test using your receiver or a servo tester and a fresh battery pack. If a servo hums but does not move, or if it moves erratically, remove the casing carefully and inspect plastic gears for rounded teeth and metal gear sets for burrs. Replace individual gears where spares exist, or consider installing a metal gear upgrade if weight and torque allow, but always check centre position and end stops after reassembly to avoid binding. If the potentiometer or PCB inside the servo is corroded or cracked, replacement of the entire servo is usually the safer choice.
Water damage demands urgency and restraint, and the first rule is do not power the system until it is confirmed dry and clean. Remove batteries immediately and dry them separately in a safe place, taking care not to short battery terminals or attempt to recharge a compromised pack. For electronics, disassemble accessible modules and rinse saltwater damage with distilled water immediately, then with isopropyl alcohol to displace moisture and help drying, while freshwater damage should be rinsed with isopropyl alcohol only after removing loose debris. Use a soft brush to remove visible corrosion and allow boards to dry fully for at least 48 hours with desiccant or a gentle stream of warm air, and only then perform continuity and functional tests to confirm recovery.
After repairs, thorough testing and conservative flight or run-in checks are essential to confirm safety and reliability. Start with a dry bench test for motor direction, control throw and failsafe behaviour, then perform a short, low-altitude flight or low-speed water trial while monitoring temperatures, vibrations and control responses. Log every repair, replacement part and test result in a notebook or digital file so recurring faults can be spotted, and when in doubt retire components that have taken severe mechanical or electrical trauma. A disciplined approach to repair, testing and record-keeping reduces the risk of repeat failures and keeps your projects safe and enjoyable.
Follow me on: Facebook: https://www.facebook.com/watdafeck3d · Instagram: https://www.instagram.com/watdafeck3d/.
Comments
Post a Comment