Beginner's Guide to Hobby Electronics: Arduino, ESP32, Circuits and Soldering.
Getting started in electronics can feel daunting, but most hobby projects begin with a few simple components and a willingness to experiment, learn and make mistakes in a safe way. This guide covers the essentials that help a beginner progress from plugging components into a breadboard to building a neat, soldered project with sensors and a wiring loom. You do not need expensive kit to begin, only a few tools, a microcontroller or two and patience to read schematics and test carefully.
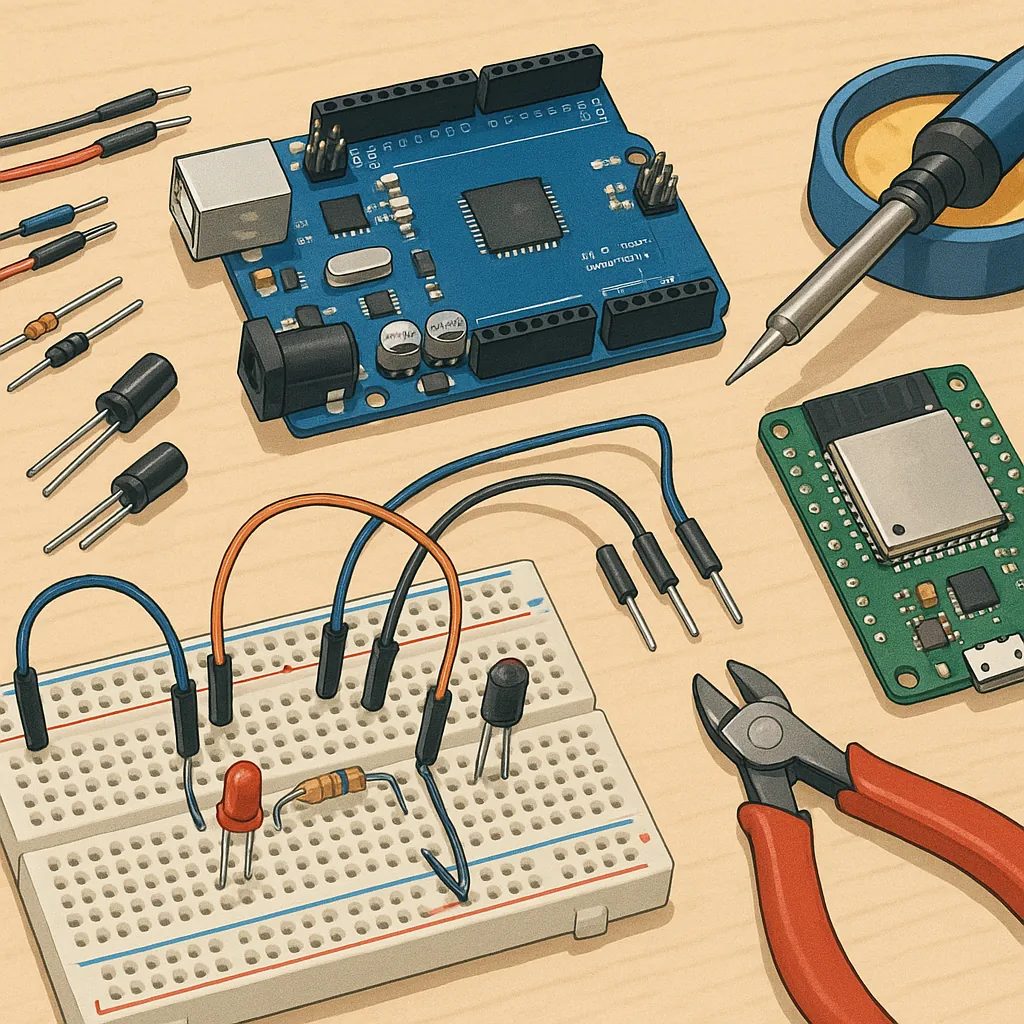
Two microcontrollers dominate beginner projects: the Arduino family and the ESP32 line. Arduino boards are superb for learning because of their straightforward IDE, large community and countless libraries for LEDs, motors and sensors. ESP32 boards add built-in Wi-Fi and Bluetooth, faster processors and more RAM, which makes them ideal for connected projects such as web-controlled sensors or data loggers. Choose Arduino for simplicity and wide support, and pick an ESP32 when you want wireless features or more processing power for tasks like audio or image handling.
Understanding basic circuits is essential before you solder anything, and breadboarding is your friend for rapid testing. Learn to read simple schematics and identify components such as resistors, capacitors, diodes and transistors, as well as sensors with analog or digital outputs. Use a multimeter to check voltages, continuity and pinouts before powering a circuit, and always include current-limiting resistors for LEDs and protective diodes for motors. Practising with a few standard circuits — such as an LED with a resistor, a push button input and a voltage divider — builds useful intuition for how components behave.
Soldering is a core skill for turning a prototype into a durable device, and good technique makes a huge difference to reliability. Invest in a temperature-controlled soldering iron, use lead-free or leaded solder depending on your local rules and workspace, and apply the right amount of flux to encourage clean joints. Keep joints shiny and smooth, avoid excessive heat on components, and trim leads after soldering to prevent shorts. Practise on scrap perfboard or old PCBs, and learn to desolder with a pump or wick so you can correct mistakes with confidence.
Sensors and wiring looms are where neat electronics look professional and stay reliable in use, especially for moving projects or installations exposed to vibration. Choose sensors with clear documentation and the right interface for your microcontroller, such as I2C, SPI, UART or simple analog outputs, and mind pull-ups, common grounds and voltage levels to avoid damage. When you make looms, keep wires neat with colour coding, use strain relief at connector points, and consider shielding twisted pairs for long runs to reduce noise. For step-by-step guides on tidy looms and practical sensor choices see the WatDaFeck blog at WatDaFeck.
Finally, pick beginner-friendly projects to build confidence and sharpen skills, such as a blinking LED and button interface on an Arduino, a temperature and humidity logger on an ESP32 that uploads data to the cloud, or a motion-sensing alarm with a small battery backup. Combine 3D-printed enclosures with neat wiring, learn simple PCB layout when you are ready, and join local maker groups or online forums to get feedback and troubleshoot issues. With consistent practice, safe habits and curiosity you will progress quickly from learning to inventing your own projects and sharing them with others.
Follow me on: Facebook: https://www.facebook.com/watdafeck3d · Instagram: https://www.instagram.com/watdafeck3d/.
Comments
Post a Comment