Carbon fibre fabrication for hobbyists: a forged carbon build log.
I decided to tackle a small forged carbon panel for an RC car body as a practice piece and to document the process for others who want to try composite work at home, focusing on moulds, vacuum bagging and reinforcement techniques that give good structural and cosmetic results.
Before I started I gathered materials and tools and planned the layup sequence carefully to avoid mistakes, and I recorded the whole build so I could share the key lessons on WatDaFeck for anyone following along at home.
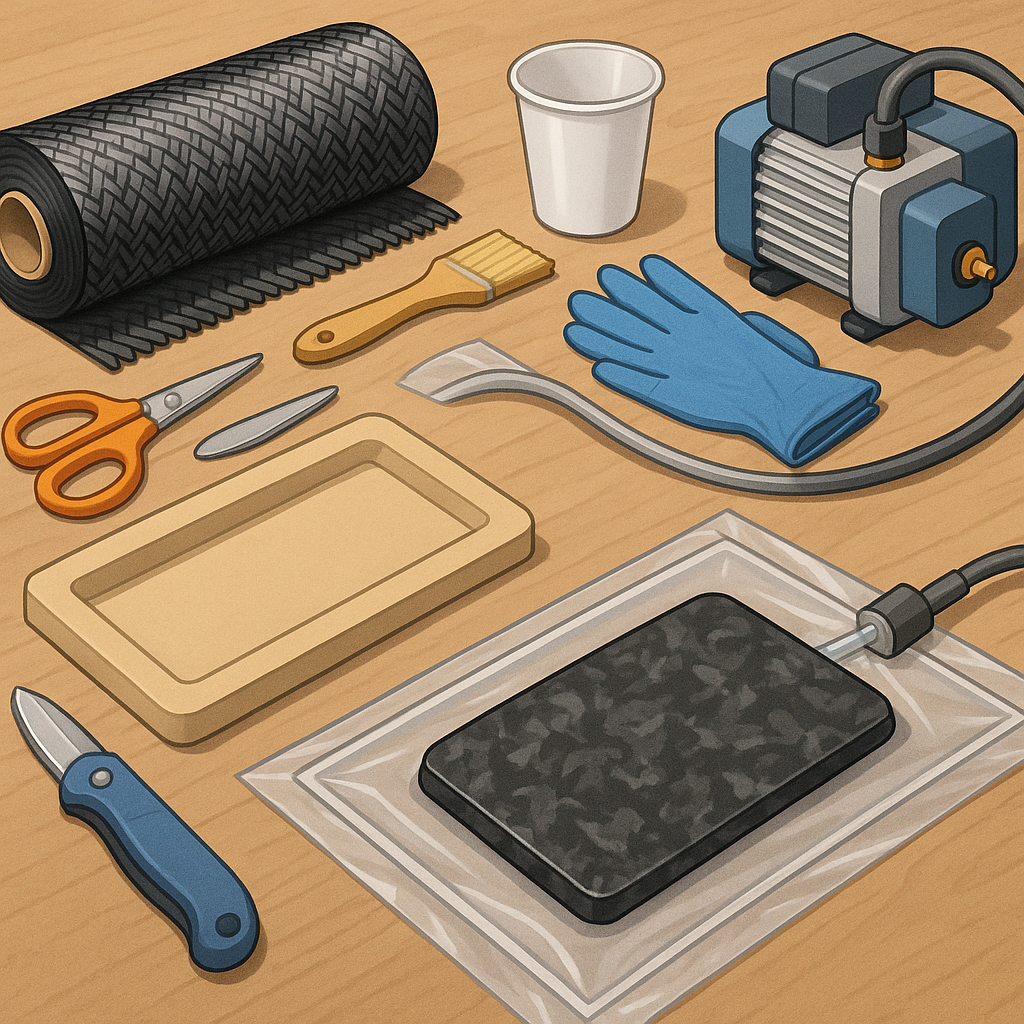
The basic kit I used was simple and affordable for a hobbyist and included the following items.
- Chopped carbon fibre for the forged carbon look and a roll of 200 g/m² woven cloth for reinforcement.
- Epoxy resin suitable for vacuum bagging, a slow hardener, and peel ply with a small patch of breather cloth.
- Vacuum pump with gauge, sealing tape, silicone rubber for a mould gasket, and a reusable vacuum bag sheet.
- Tools such as a foam core plug, release agent, mixing cups, brushes, disposable gloves and a trim saw for finishing.
I started by making a plug from a shaped block of high density foam and smoothing it with filler and sanding to the final profile, then applied multiple coats of release agent and a smooth gelcoat for a clean surface that the carbon would replicate exactly.
For the forged carbon panel I used a random chopped carbon approach rather than pure woven sheets for the visible face, and I built a female mould to support the panel during curing so the outer finish would be consistent and glossy after polish.
The layup sequence was: first a light mist coat of epoxy to wet the mould, then a layer of woven cloth around stressed areas for reinforcement, followed by a thin layer of chopped carbon mixed with resin to create the forged effect, and finally peel ply, breather and the vacuum bag; caution with resin ratios and thorough degassing during mixing helps avoid voids and blotchy cure results.
Vacuum bagging made a noticeable difference to compaction and finish quality because the pump drew out excess resin and consolidated fibres, and I ran the bag at around 0.7 to 0.8 bar of vacuum for the first hour while keeping the cure within the resin's recommended temperature range and leaving it to post cure overnight for full strength.
To improve strength I added strategically placed uni-directional reinforcement across the underside in high-load directions and used fillets of mixed resin and short fibre for edge bonding to prevent stress concentrations, then trimmed and sanded the cured panel before applying a clear coat for UV protection and shine.
Overall this small build showed that forged carbon can be approachable for hobbyists with basic mould-making and vacuum bagging skills, and that careful planning of reinforcement and cure regime gives parts that are both lightweight and durable.
Follow me on: Facebook: https://www.facebook.com/watdafeck3d · Instagram: https://www.instagram.com/watdafeck3d/.
Comments
Post a Comment