Flight controller setups for hobbyists: a step-by-step build log.
I started this build log to share a practical, repeatable workflow for setting up flight controllers for multirotors and small fixed wing craft, with a particular focus on ArduPilot, iNav, PID tuning, GPS rescue and sensor integrity. This project began with a simple brief to make a reliable platform for camera work and a second, lighter craft for FPV practice. The steps I followed are fairly generic so they will help hobbyists who want to learn how to move from parts to a safe, tuned aircraft.
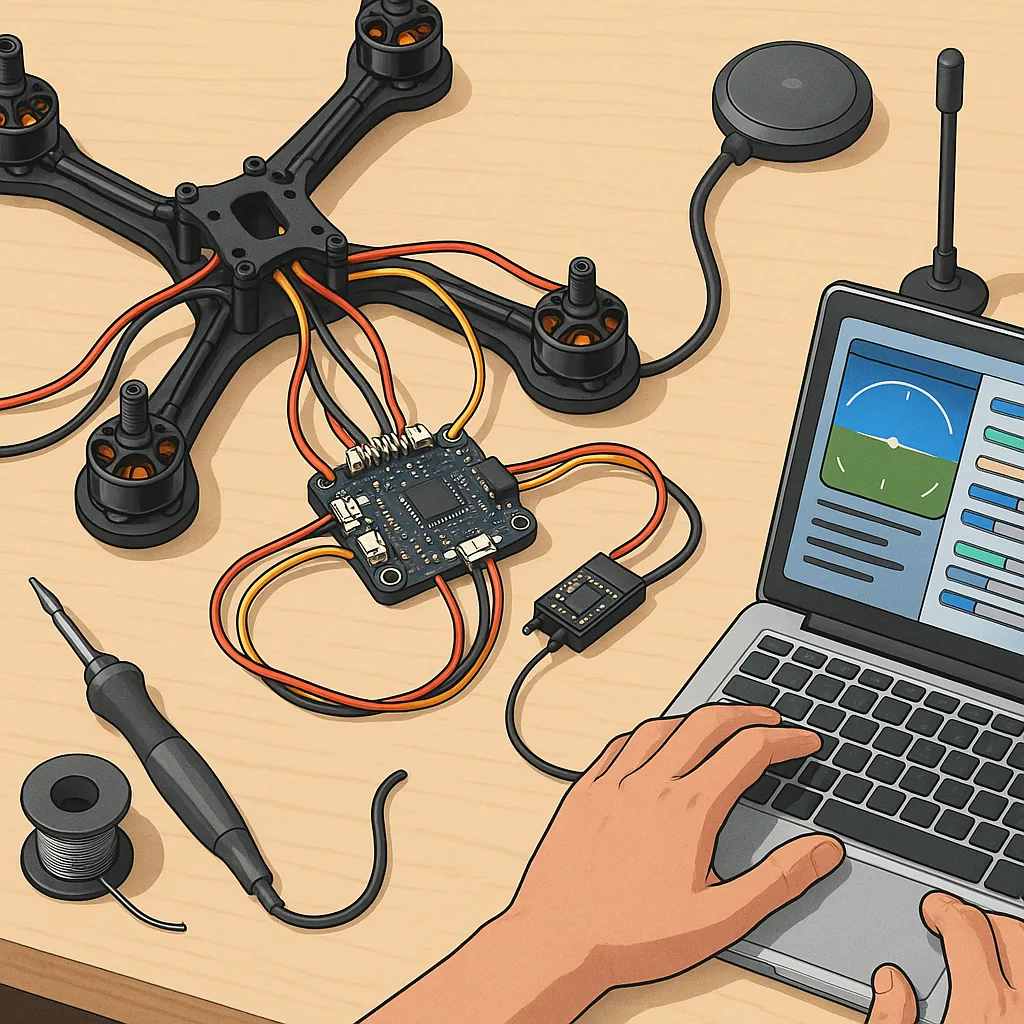
The first step was parts selection and mechanical assembly, which included choosing a flight controller with sufficient UARTs, a separate GPS/compass module, ESCs and motors matched to the frame, and a robust power distribution set-up. I paid special attention to physical layout so the compass was as far from high-current wires and noisy components as possible, and I fitted soft mounts under the flight controller to reduce vibration transmitted to the IMU. Wiring followed best practice with a common ground, a clean 5V regulator for telemetry and receiver power, and labelled cable runs to make later debugging easier.
Next came firmware and initial configuration where I chose between ArduPilot for advanced autonomy and mission planning and iNav for tight manual control and FPV features, with the choice driven by the intended use. I flashed the chosen firmware via Mission Planner for ArduPilot or iNav Configurator for iNav, set the frame type, and assigned ESC and receiver protocols before doing accelerometer, compass and radio calibration. I kept a full parts list and step photos on my site at WatDaFeck to make it easier to replicate this build and to note the exact connector orientations that caused me trouble during the first bench tests.
Sensors and calibration deserve a whole section in any build log because poor sensor behaviour wrecks flights and makes tuning impossible, so I checked magnetometer offsets, verified GPS lock with an unobstructed view of the sky, and positioned the barometer away from prop wash with light breathing tubes or small enclosures if required. I also verified that the IMU reported sensible gyro and accelerometer values and watched for high vibration on the log which indicates the need for better damping or lighter props. Calibrations were repeated if I changed mounting orientation or moved the GPS module to a different mast location.
PID tuning is where the craft comes alive and where I split my approach between careful manual steps and using autotune features where available, starting from conservative default gains and hovering gently on low throttle to assess response. The basic rule I followed was to increase P to remove lag and oscillation, then introduce I to correct steady-state drift, and finally add D to tame overshoot and high-frequency oscillation, while watching logs to ensure gains were not amplifying vibration. ArduPilot's autotune can speed the process for multirotors, but I used it only after confirming the craft was mechanically healthy, and I relied on iNav's filtering options and Blackbox logs to refine PID values for aggressive FPV setups.
Finally, setting up GPS rescue and failsafes saved me a lot of anxiety and time in testing because I configured a sensible RTL altitude, enabled geo-fencing, and programmed battery failsafe thresholds to trigger a safe return. I tested the rescue mode in a wide, open space and simulated failsafe triggers while monitoring satellite count, home position accuracy and EKF health flags to avoid surprises in flight. The last checks were a pre-flight checklist, a log buffer enabled for post-flight analysis, and a plan to iteratively refine PIDs and filters using short, controlled flights until behaviour was predictable and smooth.
Follow me on: Facebook: https://www.facebook.com/watdafeck3d · Instagram: https://www.instagram.com/watdafeck3d/.
Comments
Post a Comment