Metalwork Troubleshooting for RC Hobbyists: Aluminium, Steel, Brackets and Lightweight Structures
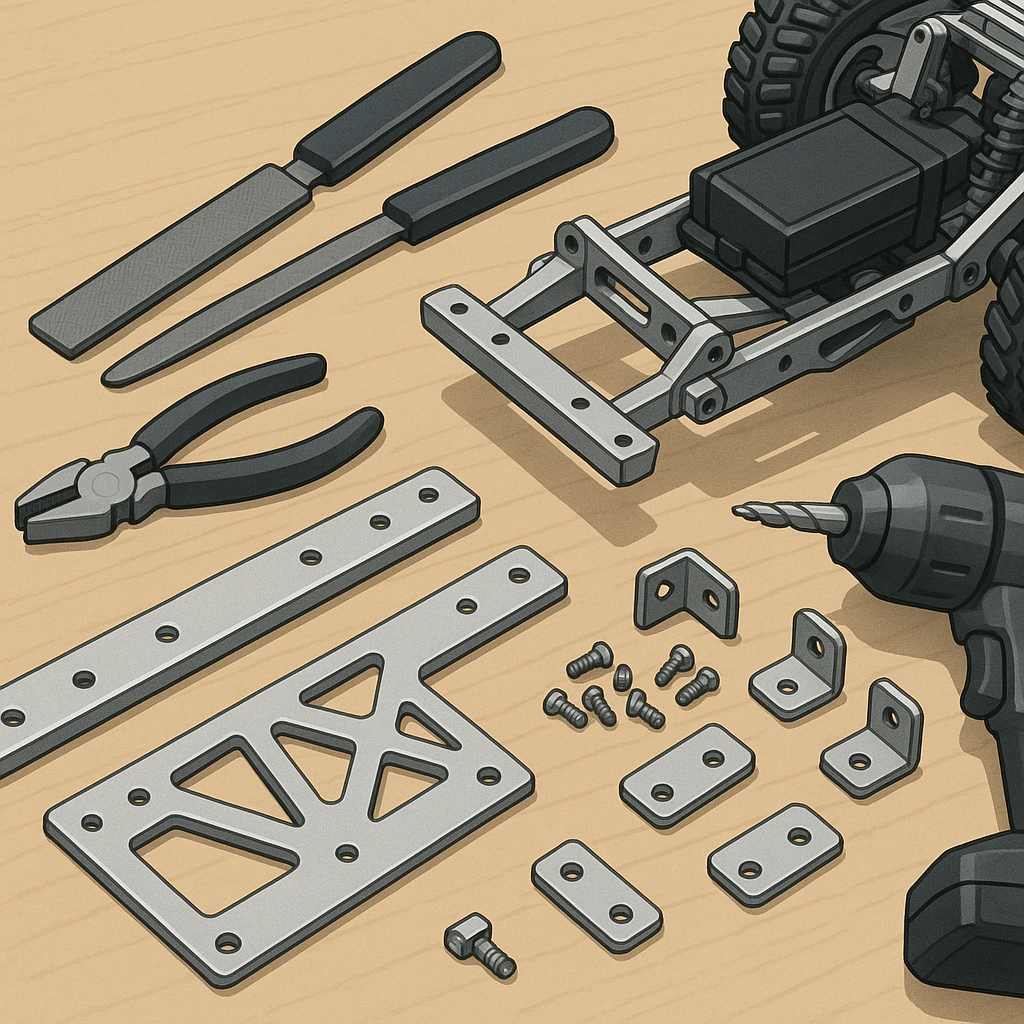
Working with metal parts for RC models is rewarding but it can also be frustrating when things go wrong, and this troubleshooting guide focuses on the common culprits you will meet with aluminium, steel, brackets and lightweight structures. Start each repair session with a clear inspection under good light and use a magnifier where fine cracks may appear, because early detection avoids larger failures. Keep a basic toolkit close at hand including a digital caliper, a small vice, files, a hacksaw or rotary cutter, and appropriate personal protective equipment for cutting and welding tasks.
Diagnose the failure mode before you try to fix anything, because a wrong repair can mask a deeper problem and cause repeat failures. Look for signs of fatigue such as hairline cracks near holes or welds, bending or buckling of thin sections, corrosion at joints where dissimilar metals meet, and loose fasteners that have worn the mating holes. If a part is bent, trace forces back to their source rather than straightening and reusing the weakened piece, because repeatedly bent aluminium work hardens and will crack if reused without annealing.
Aluminium is a common choice for RC frames because it balances strength and weight, but it has particular behaviours you must respect when troubleshooting and repairing. Remember that aluminium work hardens, so repeated bending will make it brittle and prone to cracking, and drilling near the edge will often cause tear-out unless you clamp and back the workpiece. For threaded connections consider rivnuts or helicoils rather than tapping thin alloy, and when fastening, use wide washers and a locking compound or Nyloc nuts to spread load and prevent loosening. If you want build templates, stock material advice and project write-ups check my site at WatDaFeck for more notes and examples that illustrate these points.
Steel parts behave differently and offer repair options that aluminium does not, but they bring their own risks and constraints. Mild steel can be welded or brazed reasonably easily and will tolerate some heat without catastrophic loss of strength, but you must watch for distortion and remove paint or galvanised coating before welding. Stainless steel requires specialised filler and shielding if you plan to weld, and spring steels used in linkages should not be welded or excessively heated because their temper and elasticity will be compromised. For corrosion protection apply suitable primers and topcoats, and avoid joining stainless to aluminium without an insulating layer to reduce galvanic corrosion.
Brackets and joints are the most common trouble spots because they concentrate load and often contain fasteners or welds that can fail under vibration and shock. Check bracket alignment with a straightedge and measure hole centres with a caliper, and if holes are elongated consider oversizing and using rubber bushes or shims to reduce movement. Reinforce thin brackets with small gussets or a folded lip to increase stiffness without much weight penalty, and use thread-locking compounds on critical bolts, but do not overtighten or strip aluminium threads because stripped repairs are harder than replacing a bracket.
When working on lightweight structures the goal is to keep strength while minimising mass, and successful troubleshooting often means redesign rather than repair alone. Look to add triangulation or small stiffeners at nodes, use countersunk fasteners to avoid catching and to lower profile drag, and consider bonded joints with suitable structural epoxy where welding or riveting would be heavier or impractical. A quick checklist of actions when you suspect a structural issue includes: inspect for cracks and corrosion, measure for out-of-square conditions, check fastener torque and condition, reinforce with gussets or plates if allowable, and prototype replacements in cheaper material before reworking a finished part.
Follow me on: Facebook: https://www.facebook.com/watdafeck3d · Instagram: https://www.instagram.com/watdafeck3d/.
Comments
Post a Comment