RC Jet Boat Safety: Impellers, Shallow Water Running, 3D Printed Hulls and Cooling.
Running an RC jet boat is immensely rewarding, but keeping it safe requires attention to a few specialised areas that differ from propeller-driven craft. Jet systems concentrate thrust through a compact impeller and nozzle, so damage or blockage has a greater effect on handling and motor load than on conventional models. This article gives a practical safety overview for hobbyists, focusing on impeller design, shallow water operation, 3D printed hulls and cooling strategies for motors and electronics.
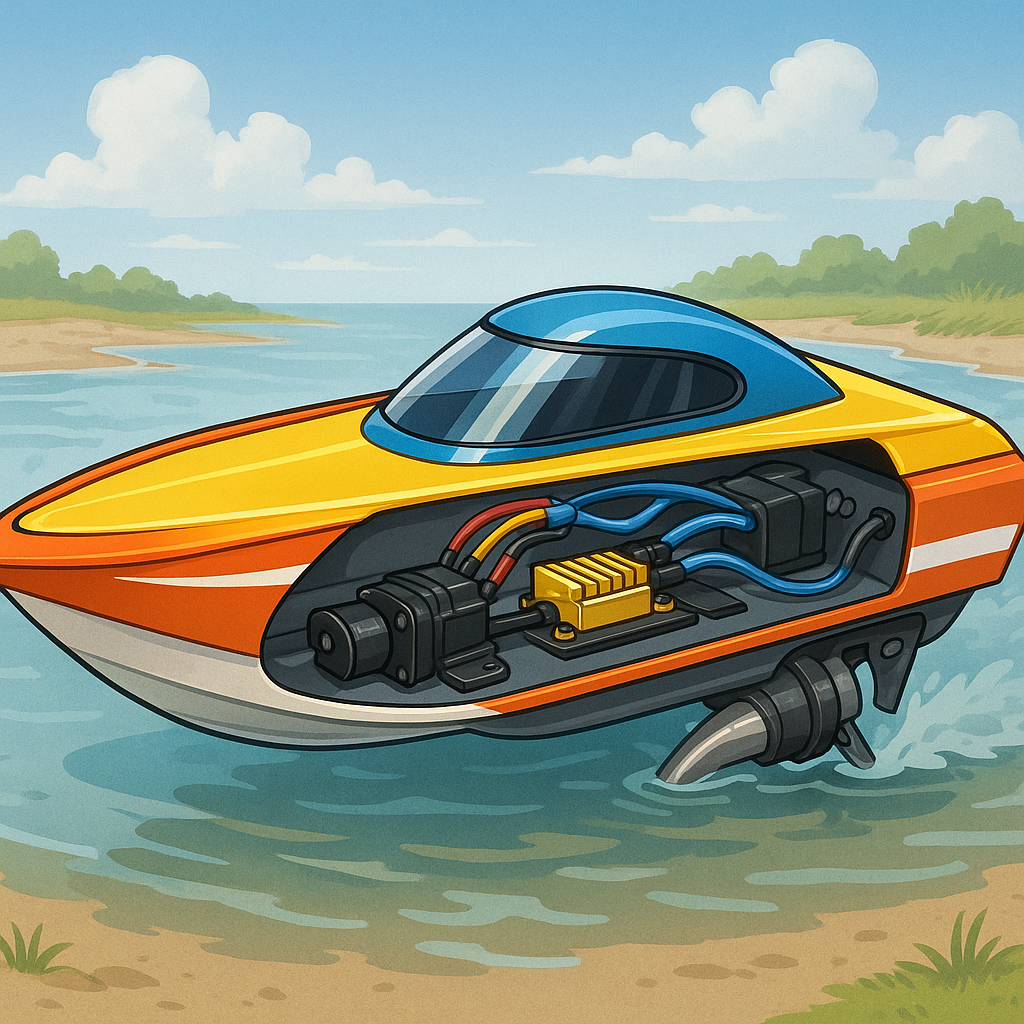
Impeller design is central to both performance and safety because the impeller is the heart of a jet drive and is susceptible to cavitation, foreign-object damage and imbalance. Choose an impeller material and geometry suited to the environment, with stainless or hardened aluminium impellers for durability and ducted or shrouded designs where debris is likely. Proper balancing and a snug fit on a hardened shaft reduce vibration that can loosen bearings, seals and mounting hardware during high rpm runs. A wear ring and sacrificial components are sensible, because replacing a wear ring is cheaper and quicker than repairing a scored tube or warped impeller housing.
Shallow water running presents a distinct set of risks because jet intakes are close to the hull and easily ingest gravel, vegetation and stones that jam the impeller and stall the motor. Always test new boats in deeper, clear water initially and keep a low-throttle policy for operations in shallow areas to reduce suction and cavitation. Consider fitting intake strainers and shortened intake mouths to lift the effective intake away from the bottom, and check for floating debris before each run. If you must run in shallow water, ensure your radio has a reliable failsafe and practise controlled deceleration and neutralisation so the boat does not beach itself or suddenly load the motor with debris.
3D printed hulls are excellent for quick iteration and custom shapes, but they demand extra care with waterproofing, strength and heat resistance compared with traditional moulded or composite hulls. Select a filament with good water resistance and UV stability such as PETG or ASA, and consider post-process sealing with epoxy or specialised marine coatings to stop slow seepage through layer lines. Reinforce high-load areas with carbon strips or embedded plywood bulkheads, and avoid very thin sections around the intake and transom that will flex under load and misalign the pump. Always build a removable electronics bay with proper o-rings and cable glands rather than relying on glued seams alone, so that batteries and ESCs can be serviced without stressing the hull structure.
Cooling is a frequent cause of failure in jet boats because the motor and ESCs are often tucked inside small compartments with limited airflow and rely on water-cooling that functions only when the boat is moving. Design a cooling loop that takes water directly from the jet stream rather than a random hull slot so it flows under all throttle conditions, and include a small bypass or flow sensor to prevent overheating at idle or during retrieval. Keep thermistors on both motor and ESC and programme thermal cutbacks in your ESC to protect components from sustained load, and route cables away from heat sources so battery temperatures remain within safe limits. Remember that 3D printed materials have lower heat tolerance than GRP, so add thermal shields or heat-absorbing layers where motors are close to the hull skin.
Before every outing complete a concise safety checklist and maintenance routine to catch predictable failures and protect bystanders, watercraft and the model itself. Check impeller free-spin and balance, inspect the intake for debris, test your cooling flow at low throttle, confirm waterproof seals around the hull and electronics bay, and verify battery charge and secure mounting. For further detailed project notes and parts lists visit WatDaFeck. Following these steps will reduce the chance of mid-run damage and keep both your model and your local waterways safe.
Follow me on: Facebook: https://www.facebook.com/watdafeck3d · Instagram: https://www.instagram.com/watdafeck3d/.
Comments
Post a Comment