CNC Foam Cutting for Hobbyists: A Beginner's Guide to Hotwire Wings and Templates.
CNC foam cutting is a fantastic entry point for makers who want to build lightweight wings, glider cores, RC boats or display models, and hotwire machines make those shapes fast and repeatable. This beginner's guide focuses on hotwire CNC techniques for airfoils and wing cores and explains how templates tie the process together. The aim is to give you a practical workflow so you can start designing and cutting your own parts with confidence.
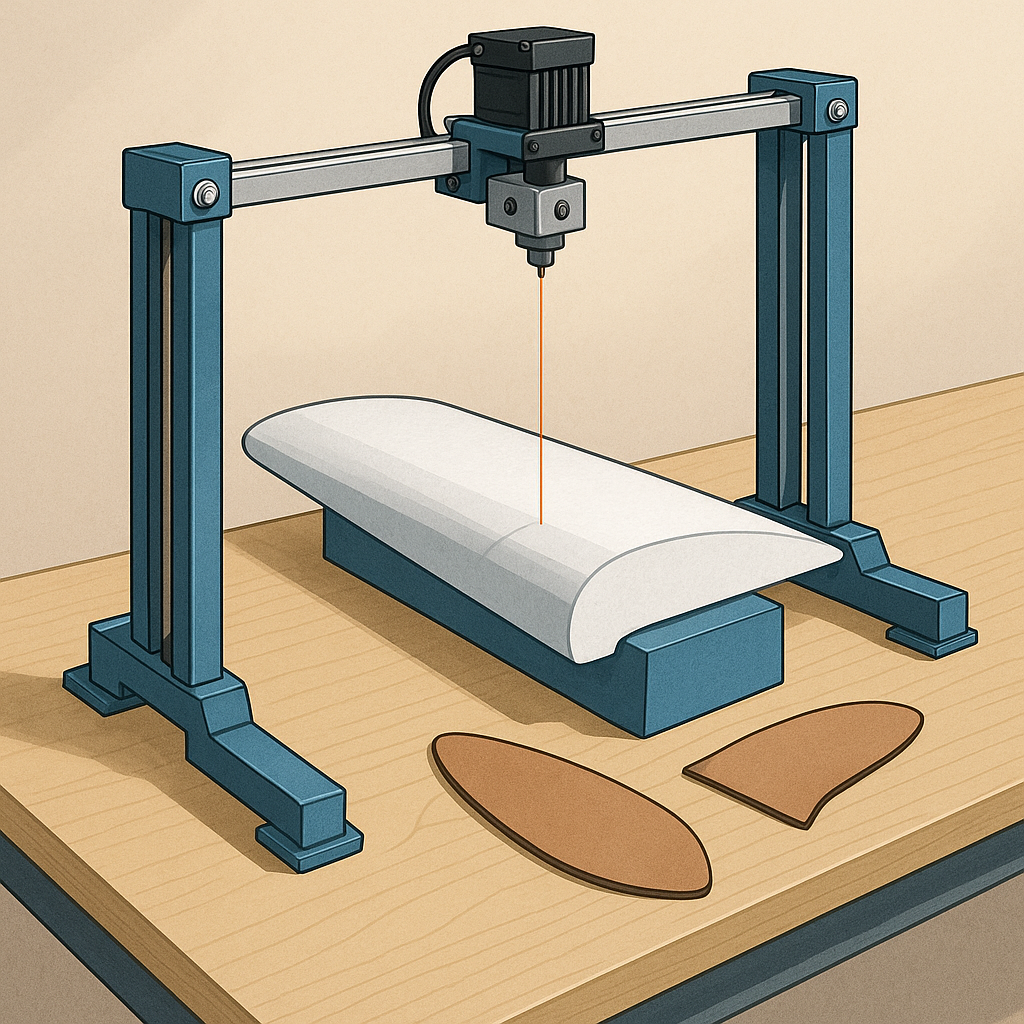
A hotwire CNC setup is conceptually simple and mechanically forgiving, which makes it ideal for hobbyists. The essential components are a rigid gantry or frame, a tensioned nichrome or stainless-steel wire, a controllable DC power supply or PWM controller, and a motion controller such as GRBL running on an Arduino or a dedicated stepper controller. Foam choice matters; expanded polystyrene (EPS) is cheap and easy to cut but crumbly, extruded polystyrene (XPS) is smoother and more durable, and EPP is tough but harder to achieve a clean finish. Keep wire tension steady and match wire temperature to feed rate to avoid excessive melting or rough edges.
Creating accurate airfoils for wings starts with coordinates from an airfoil database or from your own design software, and then converting those coordinates into a toolpath the hotwire CNC can follow. Hobbyists commonly cut wing cores by slicing a stack of foam sheets to produce a tapered wing, or by contouring a single block for higher aspect ratio wings. When slicing, stack and glue sheets with a thin adhesive, cut the outline shapes as G-code slices, and glue the resulting laminations together to form a precise core. For contour cuts, clamp the block firmly and program a continuous profile pass so the wire traces the exact airfoil section across the span. Software options range from simple coordinate-to-GCode converters to more advanced CAM, and learning to scale and rotate airfoil coordinates correctly is the key to accurate results.
Templates and jigs are invaluable whether you are hand-cutting or running a CNC, because they maintain symmetry and speed up repetitive tasks. For a hand-build, make durable plywood or acrylic templates for each station of the wing and check fit with a paper mock-up before cutting foam. For CNC work, use a sacrificial board or slotted bed to support the foam and consider a removable clamp jig so you can repeat the mounting position for multiple cores. Templates are also handy for shear webs and servo bays; cut these from thin ply, mark them on the foam and use a straight router or hotwire to remove material cleanly. Always test a template on a single scrap piece first so you can adjust offsets before committing to a full core.
Practical shop tips and safety measures will keep your projects clean and your lungs safe, so always work in a well-ventilated area and consider a fume extractor or a window fan when cutting polystyrene with hot wire. Start cuts slowly and increase feed rate as you find the sweet spot between wire heat and cutting speed, and keep an eye on wire wear which can change cut quality over time. Use a foil or light sanding to remove wire marks from a finished core, and consider coating cores with a thin layer of epoxy or a glass cloth for strength and a smooth surface before final finishing. For more build photos, parts lists and step-by-step write-ups visit the project pages on WatDaFeck for practical examples and downloadable templates.
- Choose your foam and measure the full-size wing dimensions precisely before cutting.
- Obtain or create airfoil coordinates and test a single section in software to confirm scale.
- Set up your hotwire CNC with correct wire tension and a suitable power controller for smooth temperature control.
- Cut a test piece, check the profile against a template, and adjust feed or voltage if necessary.
- Glue and finish the core carefully, add shear webs and servos, and seal with epoxy for a durable surface.
Follow me on: Facebook: https://www.facebook.com/watdafeck3d · Instagram: https://www.instagram.com/watdafeck3d/.
Comments
Post a Comment