Step-by-step build log: ESP32 + Arduino sensor loom, soldering and circuits for hobbyists.
This build log covers a small home project where I combined an ESP32 gateway with a few Arduino-based sensor nodes to make a tidy sensor network for the workshop. The goal was to learn practical soldering, loom construction and robust circuit wiring while keeping costs low and using commonly available parts. I started with a sketch on paper, a little breadboard prototyping and a shopping list for headers, connectors and sensors before moving to permanent assemblies.
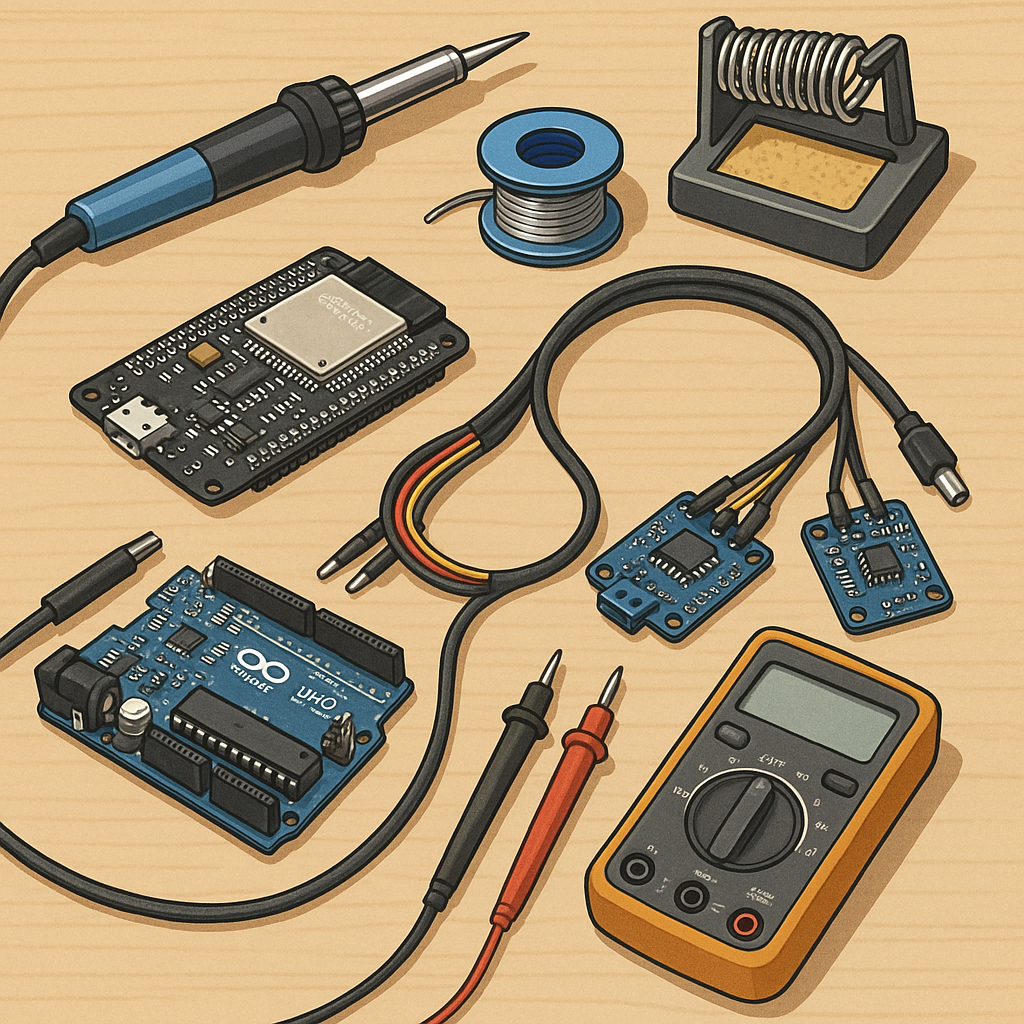
Parts and tools I used include an ESP32 development board, Arduino Pro Minis for nodes, DHT22 temperature/humidity sensors, BMP280 barometric sensors, 4-way IDC ribbon cable, female and male 0.1 inch headers, heatshrink, flux, a temperature-controlled soldering iron, a decent helping of 26–22 AWG stranded wire, a crimp tool and a multimeter. The full parts list and a short bill of materials helped me avoid mid-build runs to the shop and kept the assembly flowing.
Step 1 was breadboard testing to finalise pinouts and logic levels, since the ESP32 is 3.3 V while some Arduinos are 5 V tolerant. I verified sensor libraries and wrote a minimal sketch for the Arduino nodes to read sensors and print via serial. For the ESP32 gateway I tested a basic WiFi client that could accept simple serial input over UART from the nodes at 115200 baud. Once the code was stable I moved to stripboard for the Arduino nodes and a small perf board for the ESP32 to add headers and power conditioning capacitors.
Step 2 focused on looms and connectors, because neat cabling is almost as important as tidy solder joints for long-term reliability. I cut lengths of IDC ribbon cable and fitted them with 4-way female connectors for the node harnesses, and used individual crimped and soldered pigtails where a sensor needed a separate flying lead. Each loom was labelled with small heatshrink tags and numbered at both ends to remove ambiguity during installation. I also added a small inline ferrite and a piece of heatshrink over the connector shoulder to give some strain relief where the cable left the enclosure.
Step 3 was actual soldering and assembly, and I applied a few simple rules to keep the work clean and serviceable. Tin the iron tip and wires, use a small amount of flux, pre-tin pads on perf board and use minimal solder to form good fillets rather than blobs. For the ESP32 module I fitted right-angle headers and soldered one pin at a time, checking alignment against a socket to avoid mechanical stress. After soldering I trimmed leads, cleaned flux residue with isopropyl alcohol and did continuity checks with a multimeter before powering up any board for the first time.
Step 4 covered programming, calibration and testing, with an emphasis on iterative verification so faults are simple to isolate. I used the Arduino IDE for both the Pro Mini nodes and the ESP32, keeping the node firmware minimal and readable and enabling simple JSON strings for serial transport. After initial function tests I calibrated sensors against a reference and logged readings to a laptop to verify stability and drift. If you want the BOM, code and CAD files, see the project page on WatDaFeck for downloads and images of the finished looms and enclosures.
Finally I installed the assembled system in the workshop, mounting the ESP32 in a small 3D printed enclosure with room for the USB connector and a status LED, and routing the looms with cable ties and adhesive clips. The lessons learned were practical: label everything, build modular looms for easy replacement, and test incrementally so a single bad joint is easy to find. This approach kept the project enjoyable and educational while producing a durable sensor network that I can expand later.
Follow me on: Facebook: https://www.facebook.com/watdafeck3d · Instagram: https://www.instagram.com/watdafeck3d/.
Comments
Post a Comment