Troubleshooting Metalwork for RC: Aluminium, Steel, Brackets and Lightweight Structures
Good metalwork makes or breaks many RC projects, and problems often show up as loose mounts, creaks under load or sudden failures in a crash. This guide is written to help hobbyists identify common faults and carry out reliable repairs on aluminium and steel parts, brackets and lightweight structures. I focus on practical checks you can do in a home workshop with basic tools so you can get your model back on the road or in the air with confidence.
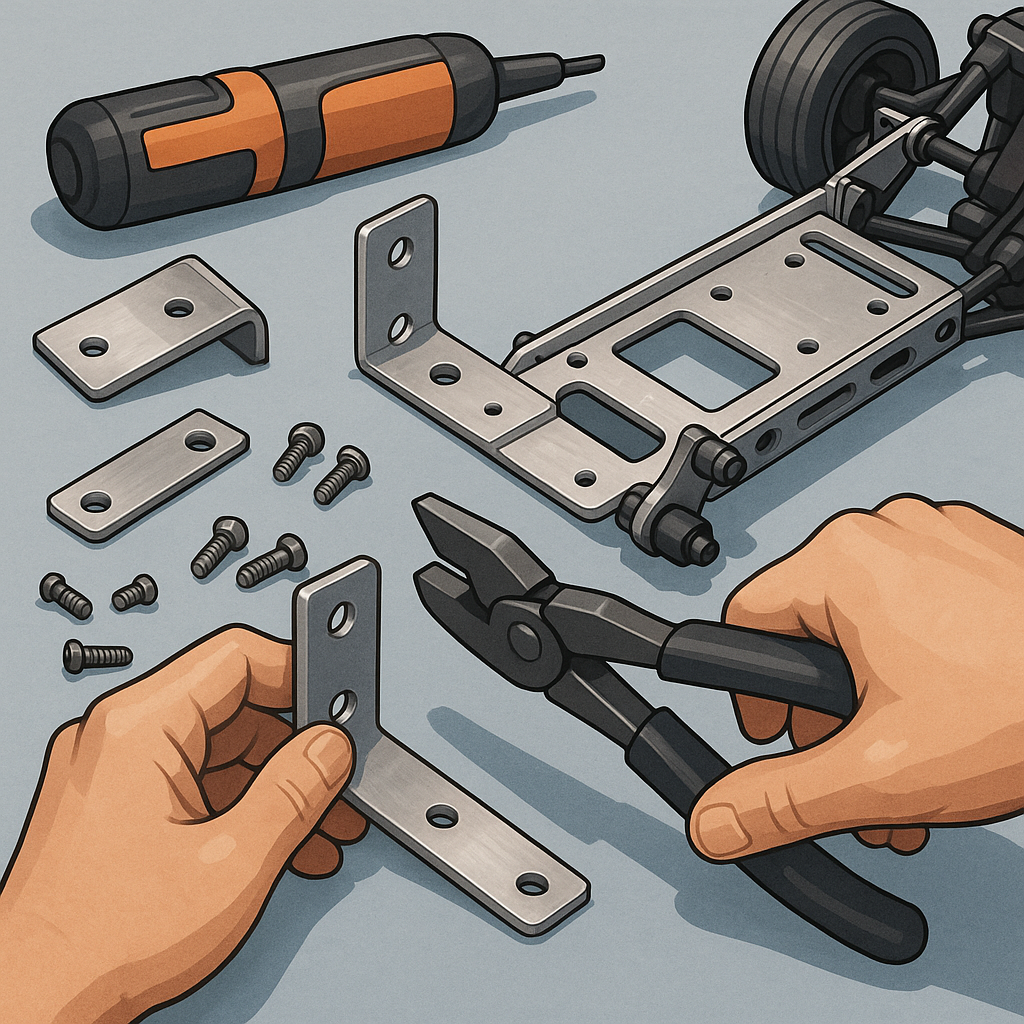
Aluminium is popular in RC because it is light and easy to machine, but it has a few quirks that cause recurring issues. Stripped threads, fatigue cracks around drilled holes and soft fastener holes are common, and the correct fixes usually mean using thread inserts, oversizing and reaming for proper fitment, or replacing parts with a stronger alloy if fatigue is advanced. I often publish detailed build notes and templates on my site at https://watdafeck.uk which include hole patterns and advice for preventing thread failures. For on-the-spot repairs, consider rivnuts or Heli-Coils and avoid over-tightening aluminium bolts to prevent deformation.
Steel behaves differently and is the default for high-load brackets and axles because of its superior strength and resistance to fatigue when heat-treated correctly. Troubleshooting steel parts usually revolves around corrosion, weld quality and distortion from past repairs, and magnetic particle or dye-penetrant testing is useful for detecting hidden cracks. If you weld steel brackets, watch out for warping by clamping and tack welding before final runs, and if replacing bushes or bearings check for runout and concentricity rather than just visual damage.
Brackets and joints deserve special attention because alignment errors and poor fastener choices cause most assembly-related failures. Look for elongated holes that indicate movement, mismatched washer behaviour between steel and aluminium that can chew up surfaces, and countersink or chamfer errors that lead to point loads. Use stainless or plated fasteners where exposure is high, but isolate dissimilar metals with nylon washers or coatings to prevent galvanic corrosion and check that torque settings match the fastener and parent material.
When you are aiming for lightweight structures, the trick is to retain stiffness where it matters and remove metal where it does not, and to do so without introducing stress concentrators. Use triangulation, gussets and flanges rather than rampant lightening holes in highly loaded webs, and keep hole edges rounded to reduce crack initiation. Choosing alloys such as 6061 for machinability or 7075 for higher strength helps, and consider bead-rolling or embossing to increase stiffness without much added weight.
- Inspect visually for cracks, corrosion or deformation and check alignment with a straight edge or feeler gauges.
- Measure fastener holes for ovality and ream to size or fit a rivnut if necessary.
- Test threads by fitting the correct bolt and consider a Heli-Coil insert for repeated stripping issues.
- Address galvanic corrosion by cleaning contact areas, applying a thin insulating layer and replacing sacrificial parts as needed.
Finally, use a measured troubleshooting workflow to fix and prevent future failures by starting with inspection, moving to measurement, then carrying out the least invasive repair first and testing under controlled load. For cracked aluminium parts, drill out the crack ends and decide on a repair by replacing, sleeving, or bonding with structural adhesives where welding is not feasible. For steel, prioritise proper welding or brazing, followed by machining to return alignment and concentricity, and log each repair so you can spot recurring weak points and redesign brackets or attachment patterns if the same joints keep failing.
Follow me on: Facebook: https://www.facebook.com/watdafeck3d · Instagram: https://www.instagram.com/watdafeck3d/.
Comments
Post a Comment