Carbon fibre fabrication for hobbyists: project ideas and practical tips.
Carbon fibre work is no longer the preserve of professional composites shops and high-end racing teams, and hobbyists can get excellent results with modest tools and careful technique. This roundup covers approachable projects and the key methods you should learn, with particular focus on forged carbon, vacuum bagging, moulds and reinforcement strategies. If you are starting out, treat this as a menu of ideas to pick from and a set of techniques to practise on small test panels before committing to a finished piece.
Here are a handful of project ideas that scale well for a home workshop and teach useful skills at the same time.
- RC car body panels and lightweight bumpers, which teach simple female moulds and trimming.
- Drone arms and propeller guards using unidirectional plies for strength and lightness.
- Forged carbon knife scales or phone cases that focus on aesthetics and short-cycle pressing techniques.
- Boat trim pieces or small rudders that demonstrate vacuum bagging for consistent consolidation.
- Bicycle bottle cages and seatpost clamps that combine reinforcement layout with post-cure finishing.
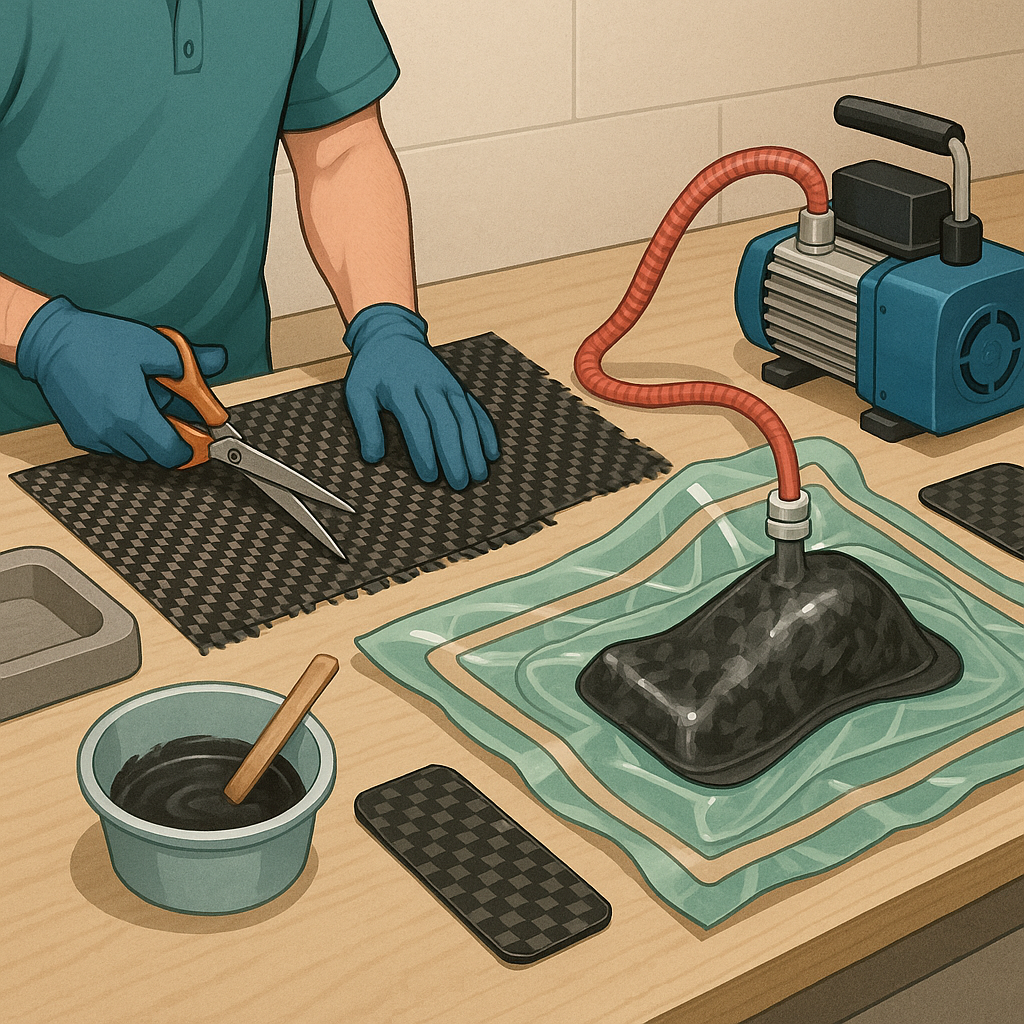
Forged carbon is an appealing entry point because it is forgiving on complex shapes and gives a mottled, stone-like finish that requires less perfect ply alignment than traditional woven-carbon layups. The basic method mixes chopped carbon with resin or pre-mixed putty, packs it into a mould and compresses it to squeeze out excess resin and consolidate the fibres, then cures under pressure. You can press small forged carbon parts with a hand clamp or in a vacuum bag with a breather layer, and then sand and polish the cured surface to bring out the characteristic pattern.
Vacuum bagging is the next technique to learn for improved strength-to-weight ratio and repeatable parts. A simple vacuum bag setup needs a vacuum pump or a good vacuum pump alternative, a bag, peel ply, breather and perforated release film or a porous caul plate, plus a reliable resin that suits room-temperature cure or low-temperature oven cures. Learning to lay up in sequence, debulk between layers and apply even vacuum pressure reduces voids and produces parts that are both stronger and lighter than hand-laid, unbagged laminates.
Moulds determine both the finish and the difficulty of a project, so choose wisely and iterate quickly with inexpensive prototypes. Start with 3D printed moulds or shaped foam cores for male moulds, then progress to simple female moulds made from tooling gelcoat and epoxy or from silicone for low-run detailed parts. Aluminium or wooden moulds are fine for flat or structural panels, while silicone moulds suit complex shapes and small decorative items. Remember release agents, wax and PVA where appropriate, and consider sacrificial tooling or a shell mould for one-off jobs.
Reinforcement strategy governs where your part is strong and where it will fail, so match fibre orientation and core materials to the load paths of the finished component. Use unidirectional plies for beams and spars, woven cloth for torsional stiffness and chopped or forged approaches where impact resistance and shape conformity matter more than maximal stiffness. Cores such as end-grain balsa, closed-cell foam or Nomex honeycomb add stiffness without much extra weight and are simple to bond between skins with suitable epoxy systems.
Finishing and safety are as important as technique for a satisfying result and a healthy workshop. Always work in a well-ventilated area with appropriate respirators and nitrile gloves, and follow datasheet guidance for resin handling and cure temperatures. For cosmetic parts, wet-sand through grades of abrasive, use a thin epoxy or polyester topcoat if required and finish with wet sanding and polish or a clear lacquer to protect the surface. For structural parts, perform test coupons to measure laminate thickness, fibre volume and mechanical behaviour before using the component in service, and keep a build log for materials and cure schedules.
For further reference materials, supplier suggestions and step-by-step write-ups that match the projects above, see the project pages at watdafeck.uk for practical walkthroughs and links to helpful products.
Comments
Post a Comment